Microsoft Outlook is a personal information manager software system from Microsoft, available as a part of the Microsoft Office suite.
Though primarily an email client, Outlook also includes such functions as calendaring, task managing, contact managing, note-taking, journal logging, and web browsing.
Some of the key articles available in Microsoft 2016:
How to setup a POP3 email account in Microsoft Outlook 2016
How to setup an IMAP email account in Microsoft Outlook 2016
Change email account from POP to IMAP in Outlook 2016
How to Enable SMTP Authentication for Microsoft Outlook 2016
How to subscribe to specific IMAP folders in Outlook 2016
Server settings in Outlook 2016
How to setup a POP3 email account in Microsoft Outlook 2016
1. Launch your Microsoft Outlook 2016.
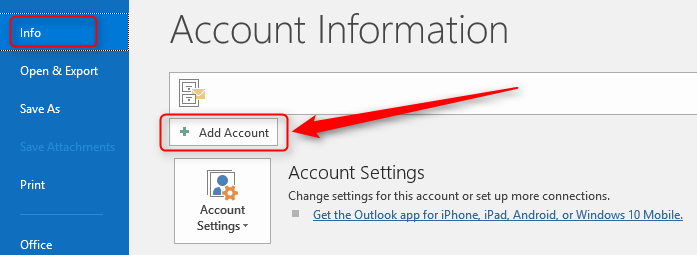
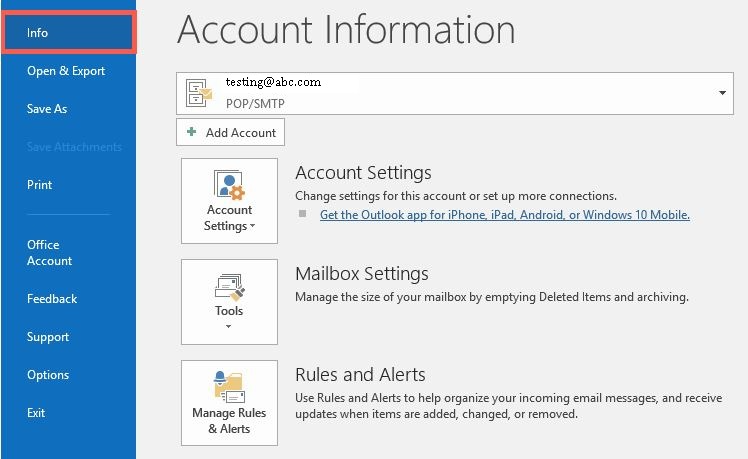
2. From Top left menu, click on FILE > make sure that Info is selected on the left > click on Add Account.


3. Enter your email address > click Advanced options > tick Let me set up my account manually then Connect.


4. Choose account type, select POP.
5. Now enter your Incoming and Outgoing servers setting in their respective text boxes.
Use the respective values depending whether you want to use SSL or NON-SSL.
NON SSL
Incoming mail server POP: mail.domain.com
Outgoing mail server SMTP : mail.domain.com
(replace your OWN domain name for domain.com)
SSL
Incoming mail server POP: serverhostname
Outgoing mail server SMTP : serverhostname
(serverhostname refers to the name of the server that is hosting your email
serverhostname can be found from your web hosting control panel server information section )
NOTE : If you choose SSL settings, check This server requires an encrypted connection (SSL) box.

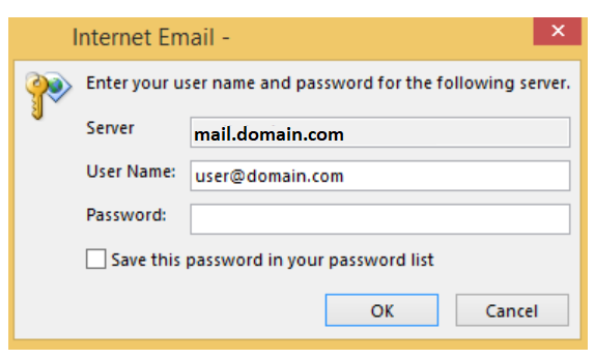
8. Enter password for your email address then Click OK.
9. Account setup is complete. Tick the checkbox if you want to setup outlook mobile on your phone then click OK.
Your email account now is ready to use.

Note: If you wish to edit the Account Setting , you may proceed with below step
1. File > Account Setting > Double click your email address > More Settings

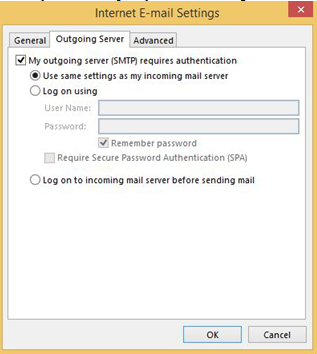
2. Click on Outgoing server tab to check on "My outgoing server (SMTP) requires authentication" as it is our currently mail server policy to allow sending from mail client.
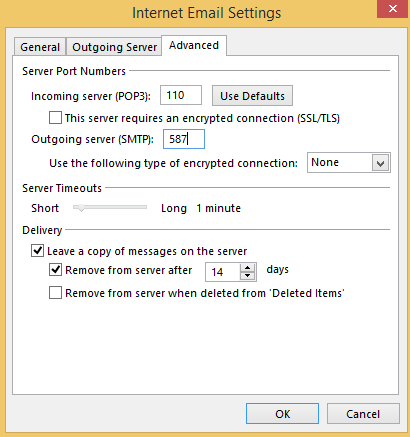
3. Click on Advanced tab and you can edit your port setting here. Use the values below.
NON-SSL
Incoming POP : 110
Outgoing SMTP : 587
SSL
Incoming POP : 995
Outgoing SMTP : 465
NOTE : If you choose SSL settings, check This server requires an encrypted connection (SSL) box.
5. After edit click OK, it will return to the Add account setting. Click on Next and click on Close after the Test Account Settings has been done.

6. Your email account in Microsoft Outlook 2016 is ready to use.

Below will be a sample of video tutorial on "How to Setup a POP3 Account in Microsoft Outlook 2016
using NON SSL setup. "
For SSL setup you may just replace the "Serverhostname" and "SSL ports" based from above steps.
How to setup an IMAP email account in Microsoft Outlook 2016
1. Launch your Microsoft Outlook 2016.
2. From Top left menu, click on FILE > make sure that Info is selected on the left > click on Add Account.

3. Enter your full email address > Click on "Advanced options" > tick "Let me set up my account manually". Then click Connect.

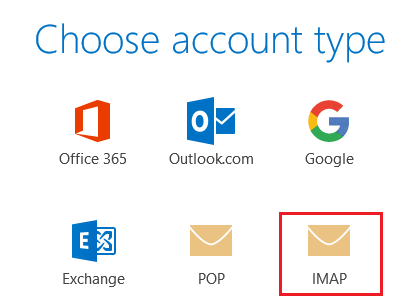
4. Choose account type, select IMAP.
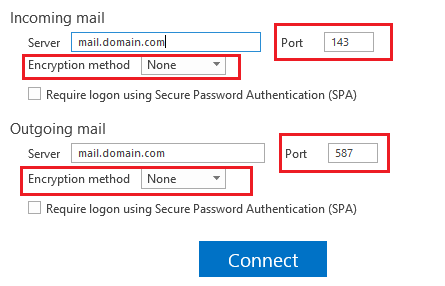
5. Now enter your Incoming and Outgoing servers setting in their respective text boxes.
Use the respective values depending whether you want to use SSL or NON-SSL.
NON-SSL
Incoming mail server IMAP : mail.domain.com
Outgoing mail server SMTP : mail.domain.com
(replace your OWN domain name for domain)
SSL
Incoming mail server IMAP : serverhostname
Outgoing mail server SMTP : serverhostname
(serverhostname refers to the name of the server that is hosting your email.
serverhostname can be found from your web hosting control panel server information section )
8. Enter password for your email address then Click OK.

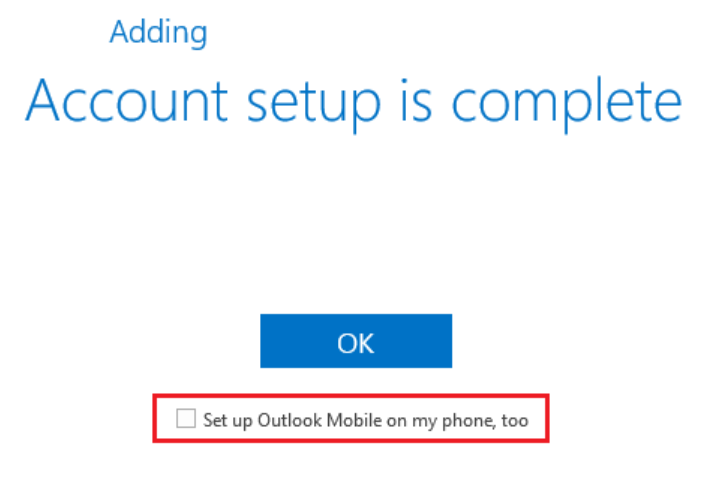
9. Account setup is complete. Check the checkbox if you want to setup outlook mobile on phone
then click OK.
Your email account now is ready to use.
Note: If you wish to edit the Account Setting , you may proceed with below step
1. File > Account Setting > Double click your email address > More Settings
2. Click on Outgoing server tab to check on My outgoing server (SMTP) requires authentication.
This is currently our mail server policy to allow sending from mail client.

3. Click on Advanced tab and you can edit your port setting here. Use the values below.
NON-SSL
Incoming IMAP : 143
Outgoing for IMAP : 587
SSL
Incoming IMAP : 993
Outgoing for IMAP : 465
NOTE : If you choose SSL settings,check This server requires an encrypted connection (SSL) box.
4. By default, system will select the option "Leave a copy of messages on the server" as a backup. Click OK.
5. After edit, click OK. Then click on Next and click on Close after the Test Account Settings has been done.
6. Your email account in Microsoft Outlook 2016 is ready to use.

Below will be a sample of video tutorial on "How to Setup an IMAP Account in Microsoft Outlook 2016
Incoming POP : 110
Incoming POP : 995
Incoming IMAP : 143
Incoming IMAP : 993
4. By default, system will select the option "Leave a copy of messages on the server" as a backup. Click OK.
using NON SSL setup. "
For SSL setup you may just replace the "Serverhostname" and "SSL ports" based from above steps.
Change email account from POP to IMAP in Outlook 2016
There are two main protocols for email applications.
1) POP3 (Post Office Protocol 3)
2) IMAP (Internet Message Access Protocol)
You can change your POP3 connection to IMAP connection via the steps below.
1. Back up mailboxes
Back up mailboxes is an important step as switching from POP3 to IMAP may cause email to be deleted.
Go to Outlook and select File>Open & Export>Import/Export.

Select Export to a file>Next.

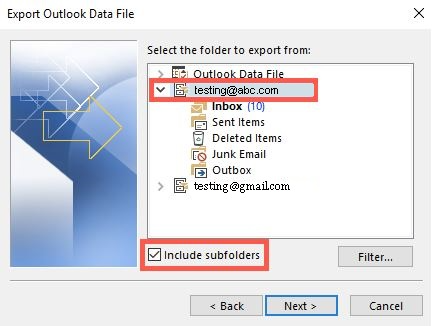
Select mailboxes that you wish to backup and ensure to check the checkbox next to Include Subfolders. Click Next.
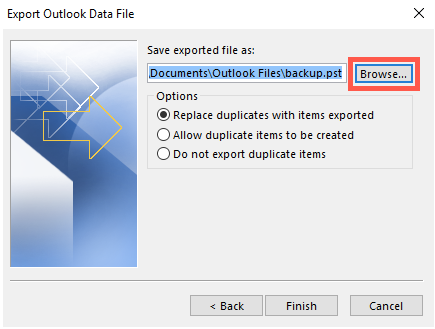
Click Browse and select a location on your computer to store the backup. Click Finish.
You can create an optional password to ensure your backed-up emails are secure. Click OK after setting the password. You may click Cancel to proceed without password.

2. Remove POP3 account from computer.
Once Step 1 is successful, proceed with deletion of POP account in Outlook and account in other devices. Select File>Info.
Go to Account Settings>Info. Click on arrow down and select Account Settings option.

Click on email account and click Remove to delete from Outlook.

A pop up will appear to inform you that all offline messages will be deleted. Click Yes to continue.

3. Set up IMAP account on computer.
Create new email account on computer using IMAP server details.
There are two ways to create new email account.
a) Click New... buttion in Account Settings.
b) Click File>Add Account

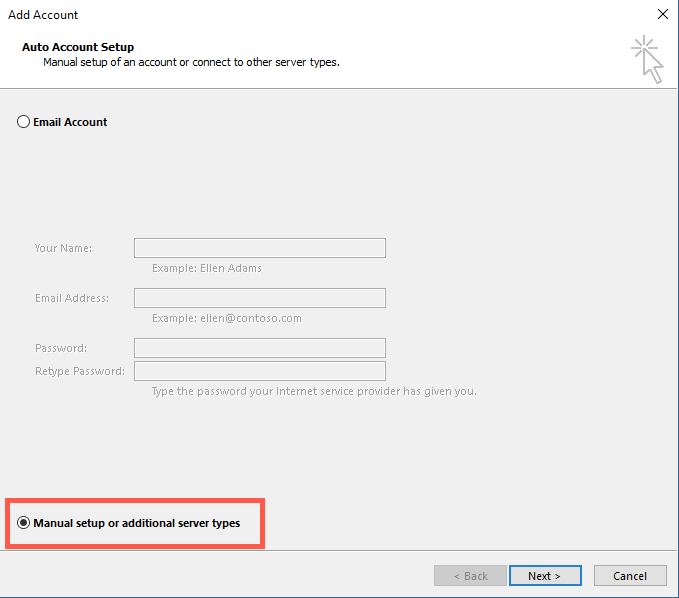
Select Manual setup or additional server types>Next to proceed.
Under Choose Your Account Type,select POP or IMAP>Next.

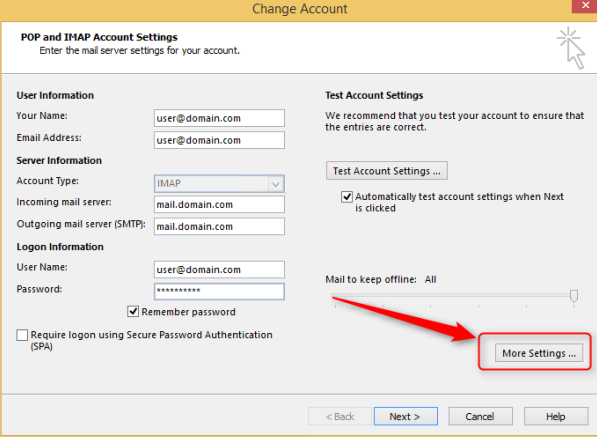
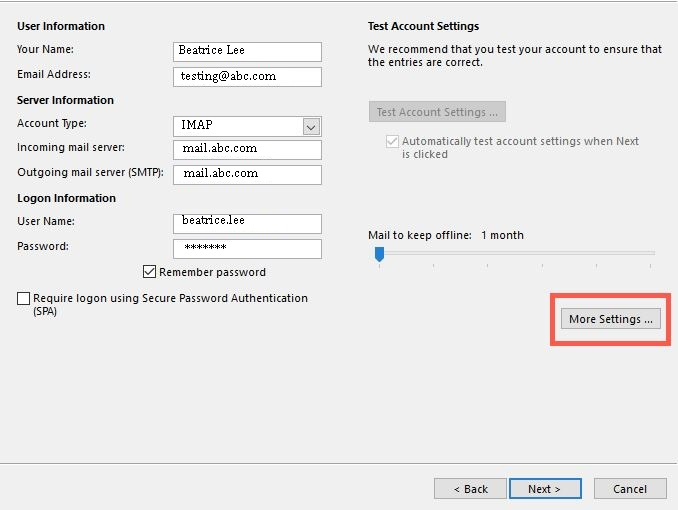
Enter IMAP server settings for email account.
a. Email address - FULL email address
b. Password - server email password
c. User Name - email account user name
d. Account Type - select IMAP from dropdown menu
e. Incoming Mail Server - mail.domain.com
f. Outgoing Mail Server (SMTP) - mail.domain.com
g. Logon information- enter email account user name and password.
Click More Settings.
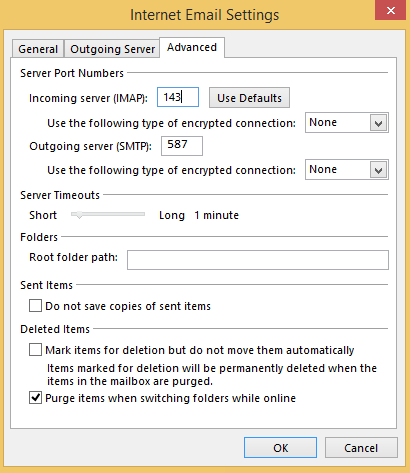
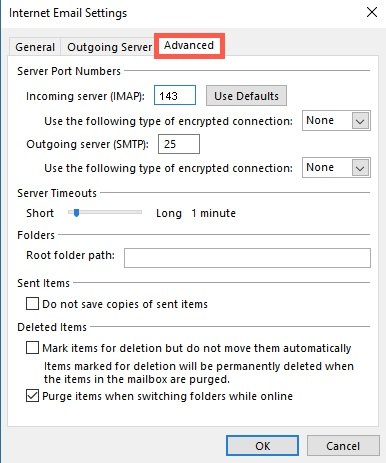
Under Internet Email Settings, click on Advanced tab.
The Non SSL settings are as below.
SSL settings are as below:

As for Outgoing Server, check the box My outgoing server (SMTP) requires authentication.
Select Use same settings as my incoming mail server.

Click OK and Next.
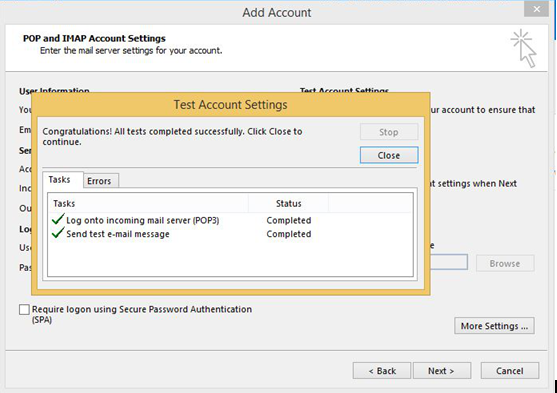
Outlook will test email settings.
In the event the testing fails, retrace steps and ensure server and account details have been entered correctly.
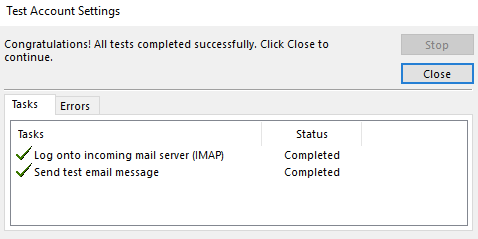
Once test is completed, click Close and Finish.

4. Restore mailbox
To restore mailbox, choose File>Open&Export>Import/Export.

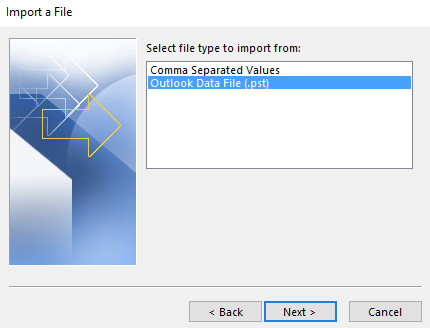
Select Import from another program or file>Next.

Under Import a File, select Outlook Data File (.pst)>Next.
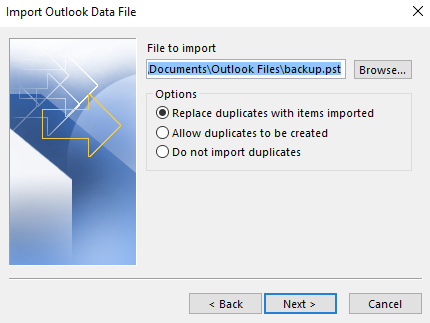
Click on Browse to retrieve Outlook backup file. You may select one of the Options to configure how Outlook treats duplicate items. Click Next.
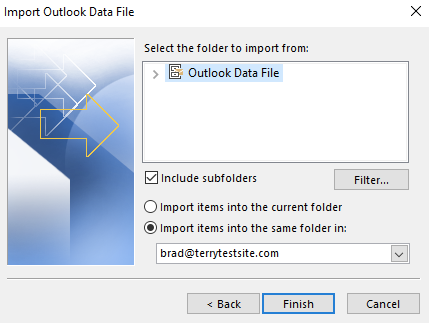
You will be asked to authorize with password for the import if you have set one during the backup. Enter the password and click OK. Select the folder you would like to import the backup data to by selecting the folder via the drop down menu. Click Finish.
How to Enable SMTP Authentication for Microsoft Outlook 2016
1. Start Outlook.
2. On the Tools menu, click Account Settings.
3. Select the email account from the list and click Change.
4. On the Change E-mail Settings window, click More Settings.
5. Click the Outgoing Server tab and check the My outgoing server (SMTP) requires authentication option.
6. Click the Advanced tab and change the Outgoing server (SMTP) port.
7. If you want to use SSL, then change the port to 465 and select SSL from the encryption drop-down menu.
8. If you don’t want to use SSL, then change the port to 25 or 587.

How to subscribe to specific IMAP folders in Outlook 2016
If you are using IMAP to connect to your mailbox then you might not see folders that are visible in webmail when you are using an email client like Outlook or Thunderbird. This article shows you how to do subscribe to an IMAP folder in Outlook 2016. It is a similar process in Outlook 2010, 2013 too.
1. Once your account is set up in Outlook go to your email account in the left pane and right-click on the email account name/top level IMAP folder.
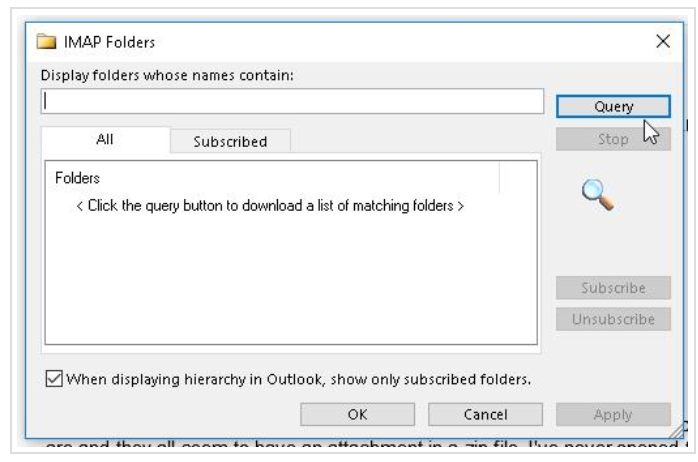
2. Click 'IMAP Folders...'

3. Click 'Query'.
4. Select the folder you are missing or want to add and then click the 'Subscribe' button. If you want to add multiple folders then press and hold the 'ctrl' key as you click on each folder. When you are done click the 'OK' button.
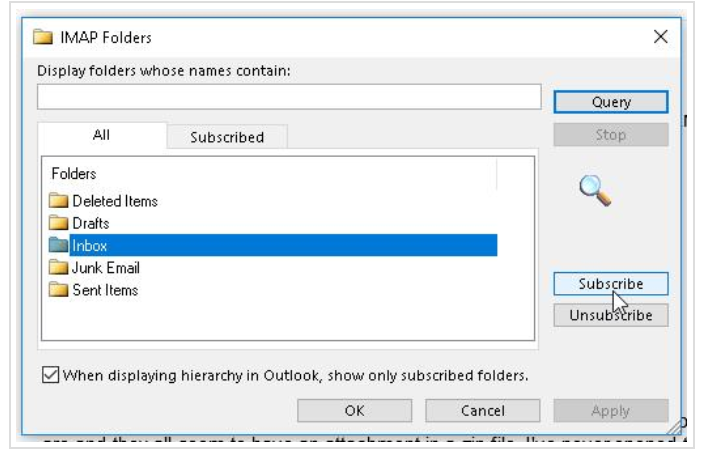
5. You should see your folders under your email account. If you don't then right-click on the email account name/top level IMAP folder and select 'Update Folder List...' from the menu

Server settings in Outlook 2016
Step 1
Open Windows Control Panel
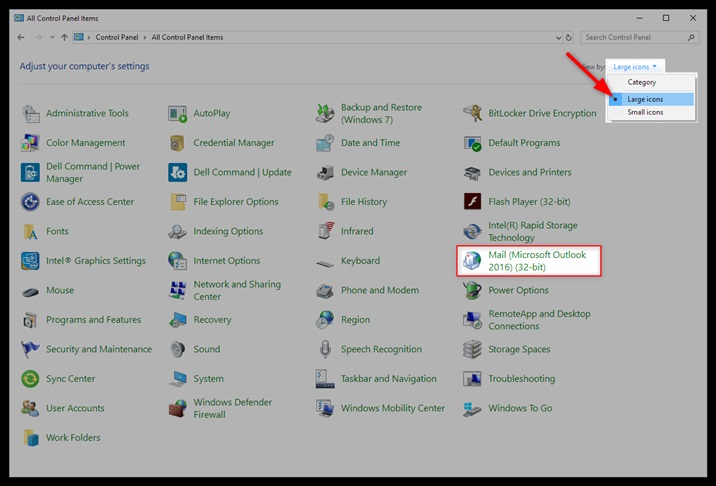
On your desktop taskbar, search for "Control Panel". Click on "Control Panel".

Step 2
Select Mail (Microsoft Outlook 2016).
Sort the "View by" tab by "Large icons" and select "Mail (Microsoft Outlook 2016).
Step 3
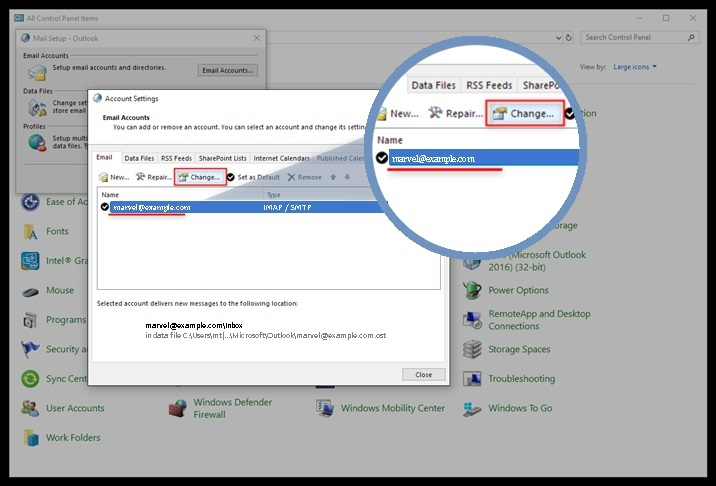
Select "Email Accounts".

Step 4
Select an email account and tap "Change".
Step 5
Check Mail Setup - Outlook.
Check Mail Setup - Outlook settings are input correctly:
- Account Type: IMAP / POP (Recommended: IMAP)
- Incoming Mail Server: mail.example.com (IMAP) / mail.example.com (POP)
- Outgoing Mail Server: mail.example.com
- User Name: your email address in full i.e. (marvel@example.com)
- Password: Login password for Webmail.

Step 6
Select "More Settings".

Step 7
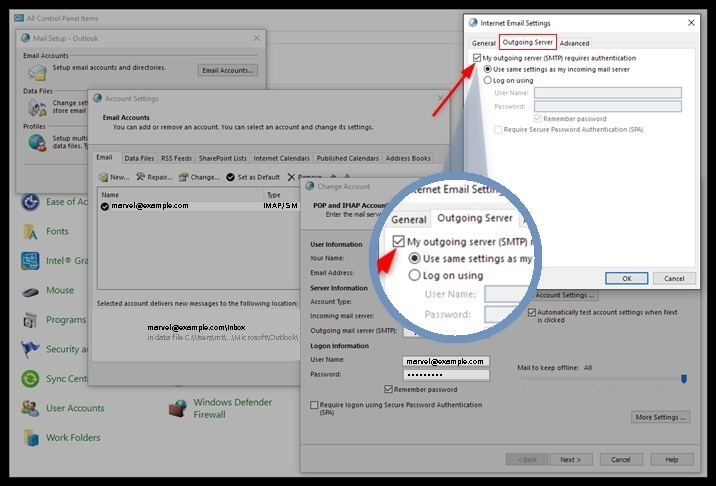
Check additional Outgoing Server settings.
1. Move your cursor to the tab "Outgoing Server" next to "General". Click on the tab "Outgoing Server".
2. Check the box "My outgoing server (SMTP) requires authentication".
3. Check the box "Use same settings as my incoming mail server".
Step 8
Check Advanced Tab (ports, encryption and root folder path)
1. Move your cursor to "Advanced" tab. Click on "Advanced" tab.
2. Check whether ports and encryption is correctly configured.
Default settings:
- Incoming server (IMAP) - port 993 - encryption SSL/TLS
- Outgoing server (SMTP) - port 465 - encryption SSL/TLS
Note: If you prefer POP as account type, below is the setting to enter in Incoming Server under Advanced Tab for port and encryption.
Default settings:
- Incoming server (IMAP) - port 995 - encryption SSL/TLS
3. Ensure "INBOX" in capital letter is entered in Root Folder path.
4. Click "OK".

Step 9
SAVE your settings.
Click NEXT and Outlook will proceed to test the account settings.
Click CLOSE when testing is completed.
Click FINISH to complete setup.
