1. Access your account at sites.google.com.

2.Select the Settings menu [gear icon] > Choose Custom URLs > Enter the domain with www, in line with your domain name. Then choose verify your ownership.

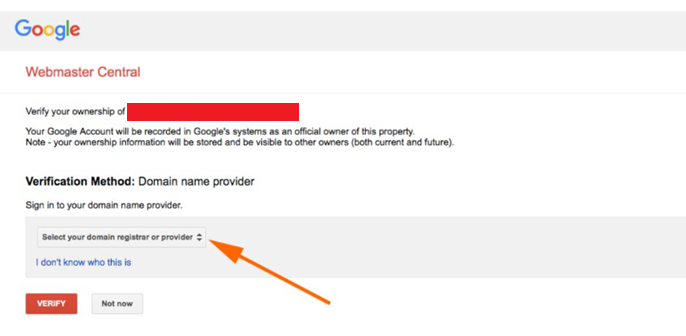
3. A new page titled Webmaster Central opens, where you can click on the dropdown menu asking:
Select your domain registrar or provider, then choose other.
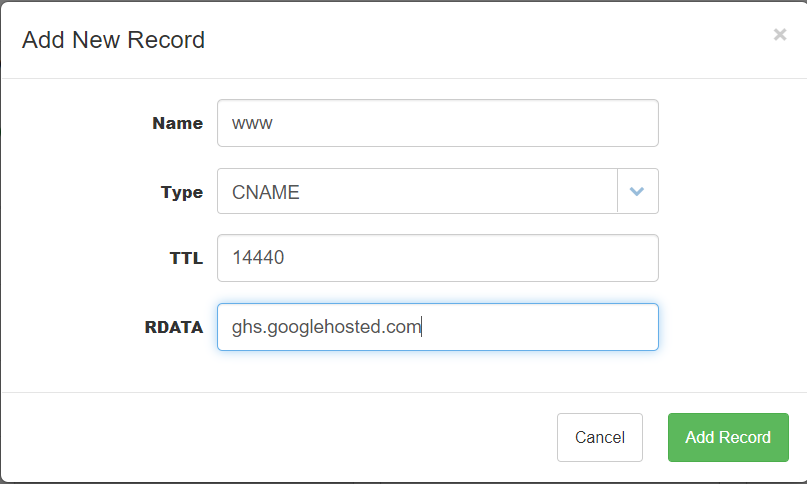
4. Following that, the domain verification method page will show up. You can opt for CNAME or TXT.For CNAME, click Add CNAME to retrieve CNAME record information.
For instance, we're using TXT record. Copy and paste the TXT DNS record as depicted below.
5. To verify TXT and CNAME, you must first enter both records. Please log into your Client Area:
MY client: https://billing.exabytes.com/mypanel/login
US client: https://billing.exabytes.com/mypanel/login
SG client: https://billing.exabytes.com/mypanel/login
6. Go to the Domain menu and select manage DNS.

7. Select the Domain name then click Add New Zone.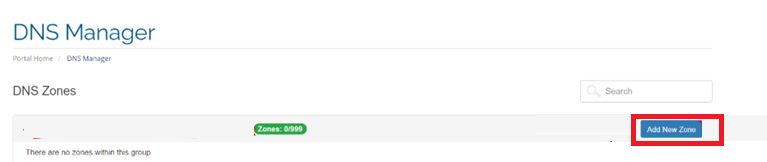
8.Select ADD ZONE.

9. Enter the TXT record and click Add Record.

10.Input the name and click Add Record. If everything is in order, then SAVE CHANGE.
11. After you’ve created the two DNS records above, you’ll need to wait for the DNS propagation to occur, which is estimated to take 1-2 hours after the DNS is set up. Following that, click the "Verify" button for the validation process.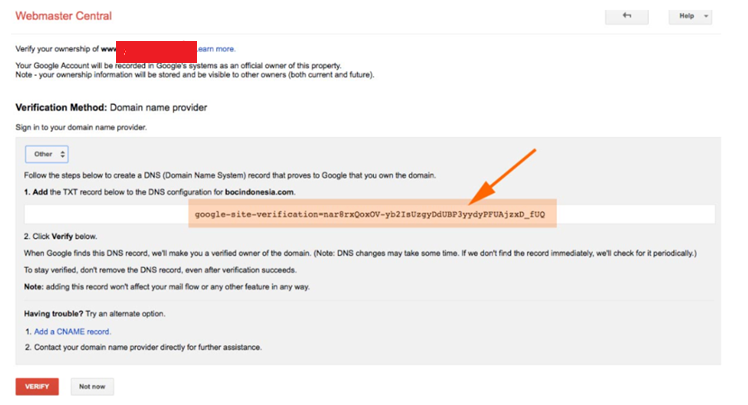
12. Once successful, a display will appear as shown below. However, if it hasn’t been successfully saved, please be patient for the DNS propagation, which can take approximately 1-24 hours. Please attempt again in the next few hours.

13. If the domain Ownership has been confirmed, return to the Google Suites page. Enter the domain name with www > then click Assign.
If Assign is not visible, please refresh the page first. 