Part 1: Update Your Domain Name server
To begin, update your domain name server to the ones listed below. This links your domain to Exabytes complimentary FREE DNS Zone. Follow this guidelines for the domain name server update.
Please allow approximately 3 to 4 hours for DNS changes to fully propagate.
Name servers for Exabytes Malaysia (Exabytes.my):
- ns184.mschosting.com
- ns185.mschosting.com
- ns186.mschosting.com
Important: If your domain already has DNS Zone records, complete Part 2 first to minimize downtime before changing the domain name server.
Part 2: Manage DNS Zone in your Billing Account
Follow these steps to add or manage your DNS zone records:
- Log in to your Exabytes billing account HERE.
- From the top menu, navigate to: Domains > Manage DNS.

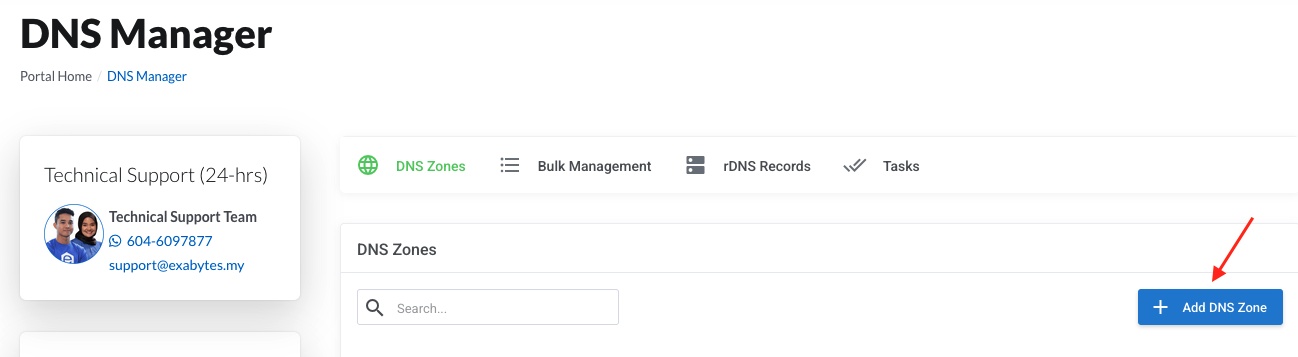
3. Click Add DNS Zone and select the domain name you wish to set up under Related Item.
4. Ensure the DNS Zone Name is the one, add in IP Address, then click Confirm. (Optional: You may also input the IP address of your hosting server.)

- Your domain DNS zone will appear at the bottom of the list.
- Click on Add Record to start adding A records, CNAME, TXT, and MX records.
- Click the Edit button next to the domain to start editing respective A records, CNAME, TXT, and MX records.
- Click Confirm after modifying each DNS record.

Supported DNS Record Types
- A Record: Maps your domain/subdomain to an IPv4 address.
- CNAME Record: Creates an alias pointing to another domain name.
- MX Record: Directs email for your domain to a mail server.
- TXT Record: Adds text data used for domain verification, SPF, DKIM, etc.